Outlook Express Settings
- Open Outlook Express. Click Tools then Accounts. Click on the Mail tab.
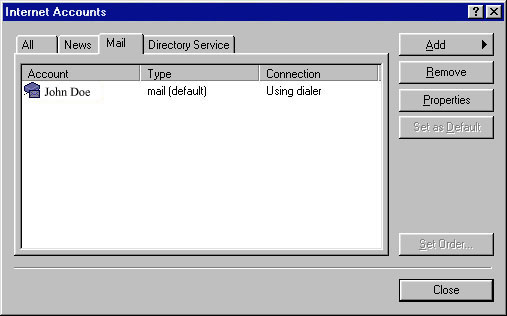
- For a new account click ADD and go to the next step.
(If you already
have an email account set up in Outlook Express for some other mail provider,
and want to change it to start getting your mail from Dynamis instead,
then highlight the account, then click Properties then click here for further
instructions).
Creating a new account
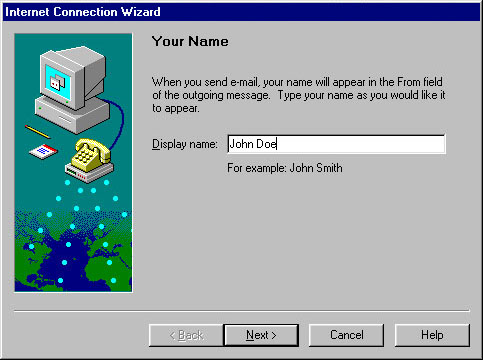
Click Add then click Mail. A wizard will start. Enter your real name then
click Next.
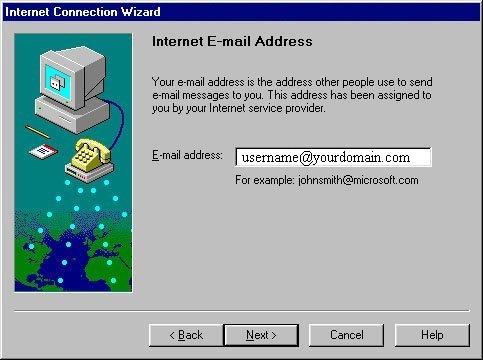
 Enter your full email address then click Next. (Instead of username, type your your username, and instead of yourdomain.com, type your domain name, which might actually end in .com, .net, .org, or .cc, depending on what domain name you registered. Note: the domain you type must be hosted by Dynamis for this to work).
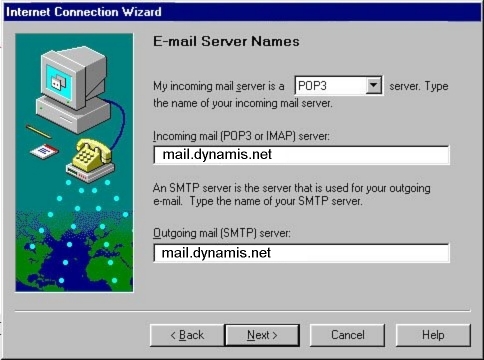
 Make sure Pop3 is selected at the top. Supply the Incoming and Outgoing
mail servers then click Next.
- Incoming = mail.dynamis.net
- Outgoing = mail.dynamis.net
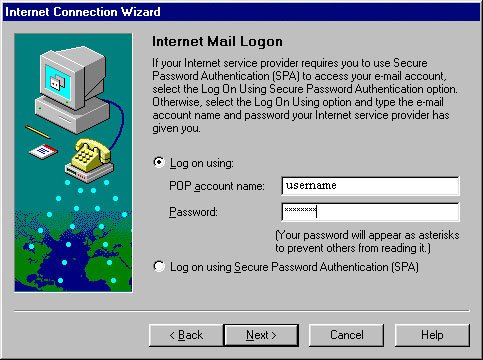
 Enter your username and password. Click Next.
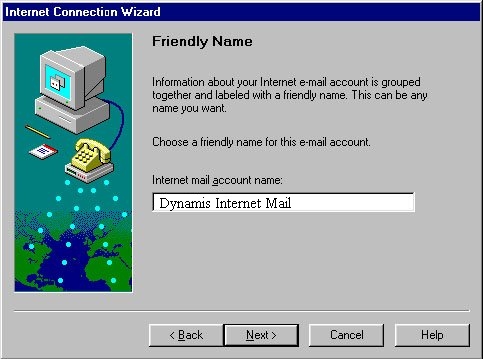
 Type in Dynamis Internet Mail for the account name as shown and click Next.
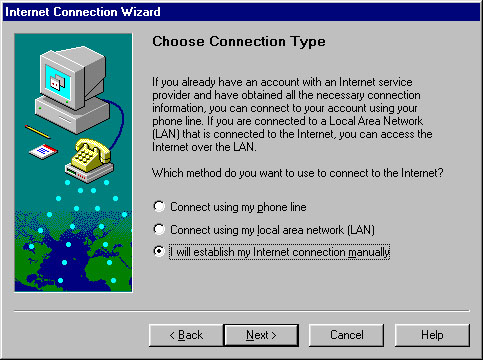
 Make sure the 3rd dot is marked as shown. Click next then click Finish.
(Now continue with the rest of the instructions, to double-check your settings and also
to click one additional setting regarding authentication. Read on for details).
Configuring an existing account
Note: depending on the version you are using, the pictures may not match.
If not, check the Outlook
settings.
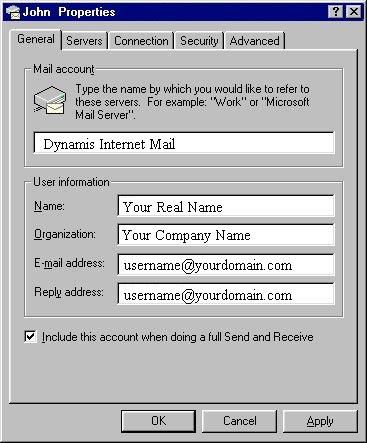
After clicking Properties click on the General tab. Supply your
real name and the whole email and reply account address as shown. If you have
a domain name you may use that address as the Reply address.
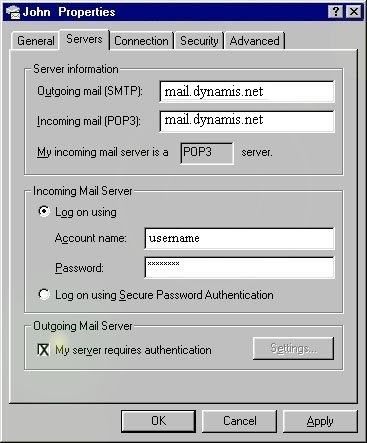
 Click on the Servers tab. Enter your information as shown, substituting your username instead of "username".
ALSO, BE SURE TO SELECT THE OPTION AT THE BOTTOM WHICH SAYS "My Server Requires Authentication."
- Incoming = mail.dynamis.net
- Outgoing = mail.dynamis.net
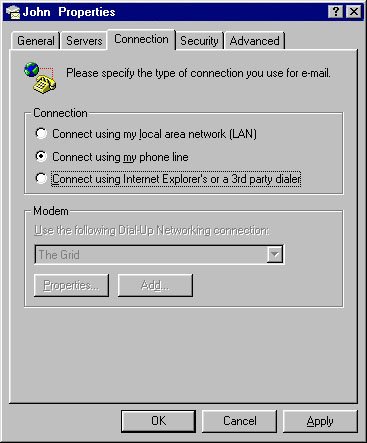
 Click on the Connection tab. Make sure the second circle is marked. If you
wish to use Outlook Express to dial in when you open it, check the 3rd circle
and choose your internet service provider (or whatever you named your internet dialup connection) from the dropdown box under the Modem
section. Click OK and you are done.
|

